It’s raining again and just how long does it take to c hange a light bulb?
|
“42:46.59N 9:03.38W” 1007 Miles since leaving Sandwich (Still) It’s raining again and just how long does it take to change a light bulb? While we await the outcome of the freezer compressor saga Norma and myself have been keeping ourselves busy with exploring Muros and catching up on maintenance while the sun was shining. Norma attacked the port aft rail which was beginning to look a bit tatty and needed the varnish refreshing. While she was occupied with that, I thought I would tackle a little job that has been bugging me for months. For some reason the port side reading light in the forward cabin was very dim, still working but very dim so armed with my trusty voltmeter and a screwdriver I took it apart. I swapped the bulb – no change. I swapped the whole light fitting for one that was definitely working – no change.
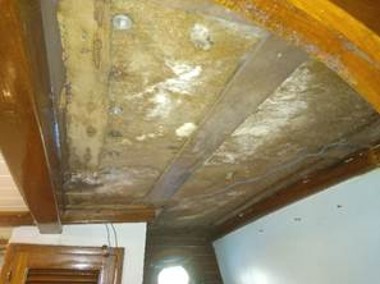
Taking the dim light off the wall I checked the voltage which started at 14 volts and then as I watched it the steadily dropped to 8 volts – very weird that one. Now I was getting curious. The next logical step was to trace the wiring backwards. There is a junction box in the saloon hidden in the locker that has the safe and I started there. After finding the right pair of wires I disconnected them and twisted them together, back in the front cabin I checked the continuity – There was none, which, as I had at least a dim light was impossible but having worked on boats for long enough I ignored the impossible and soldiered on. In between the saloon and the forward cabin is the forward heads (bathroom) which logically the wires must run through and so I moved the centre of operations into there. Inside the cabinet in the heads I have another junction box and I checked this wiring. Back to the saloon good, forward to the cabin light bad, now I was getting somewhere. At this point I removed one of the lights in the forward heads ceiling panel and although it was working found water dripping through the hole which is never a good thing. On closer inspection I found water damage in the corner of the ceiling panel as well, there was nothing for it the ceiling would have to come down. It was getting late now and so I made a start planning to take the ceiling down fully the next day. Two-bathroom cabinets had to be removed from the wall before I could access the ceiling fully. I couldn’t get to them easily and so I had to remove the door to the forward heads first. Both of those jobs completed, and with the door and cabinets shoved into the forward cabin, I called it quits for the night. Day two dawned sunny and clear and I set to work with bright optimism for a quick fix. 30 screws later I had removed everything that held the ceiling in place. With a bit of gentle persuasion, the whole lot dropped down onto my head which was lucky because if it had hit the floor it might have damaged something. All of the ceiling timber was then moved to the saloon table.
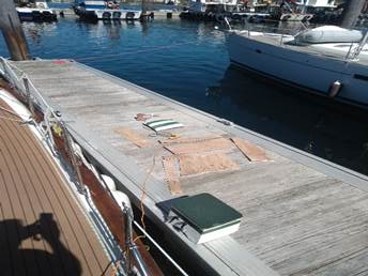
The ceiling on the saloon table One or two of the tongue and groove planks were showing serious water damage on the underside and the roof was very wet in one corner. As I had re-cored the deck on that side of the boat when we were ashore in Sandwich which involved pouring over 75 Kg of resin into the deck cavity, I was not at all impressed by this turn of events. Looking closer with a bright light I noticed that a water stain travelled from near a bolt through the deck along the inside of the fibreglass and then down through a small hole in the inner fibreglass layer. It is pointless plugging leaks from inside and so I moved the centre of operations outside. On deck there is a stainless-steel track running across the boat that controls the stay sail sheets. This is through bolted along its length and was the obvious suspect for the problem. I pulled the bolts and resealed them before finding a hole through the track at the end where the block is attached. This hole is used for a locking pin to engage but the bottom had been drilled too deeply (by me) allowing water to get into the wooden core below.
The pesky little hole that was allowing water to get in This then pooled and eventually worked its way down a bolt and across the inside of the deck for about 75mm before slowly seeping out of a fixing hole. Over time this small leak saturated the head lining in the forward heads. Or in shorthand it was a little bugger that sneaked up on me while I had been sleeping. The hole was easily filled and if no more water gets in the core below will dry out over the next month or so as evaporates downwards through small holes in the lining. This won’t cause any damage and so I am happy that that is now fixed. Another result of this damp in the headlining was the wiring had suffered in that area and all needed replaced but first I had to repair the wooden head lining. Taking everything outside I sanded it all down, painted the inside with waterproof sealer and after filling repainted the outside white again.
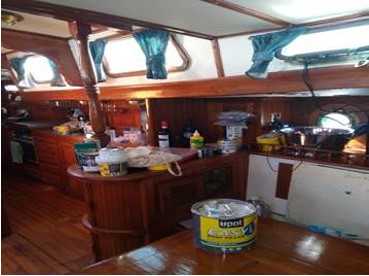
Sanded and ready for painting Of course. all of the paint was stored in one of our deep lockers which required the complete trashing of the saloon to get at.
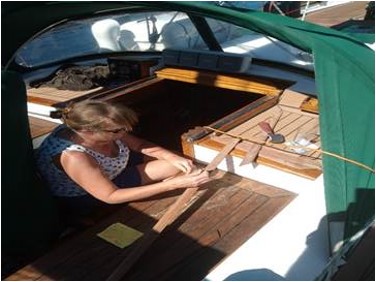
One completely trashed saloon While this was going on Norma had finished her task and lent a hand rubbing down and varnishing the wooden trim that holds the head lining in place. And that ended day two.
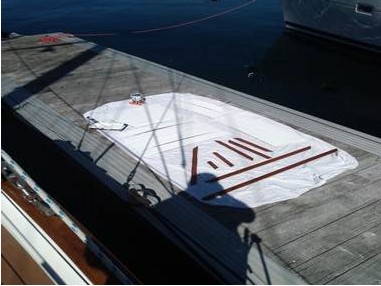
Norma sands the wooden trim before the new varnish goes on Day three dawned bright and early and unjaded I started in on the tasks of the day. The headlining still had some dark patches, and I gave it a second coat of paint. Likewise, Normas wooden trim needed a second coat of varnish which was duly applied by my good self.
All painted and drying in the sun While that was drying, I poured some, “Captain Tolly’s Creeping Crack Cure” onto the bolt heads of the stay sail track and down the locking pin hole just to make sure that any future source of water ingress was well and truly blocked. While all of that was drying, I remembered that I still had another job to do – fix the dim light in the forward cabin. Actually, this was quite easy as I just had to remove all of the existing wires and replace them with new. This took about a couple of hours and then the big test. Everything lit up as expected and what’s more all of the lights were now bright. One downside was that I dropped a light fitting and cracked the glass. As I didn’t have a spare that fitted, I glued the three pieces together and proclaimed it fixed. The paint and varnish were still drying so I tidied up the mess as best I could and called it a day.
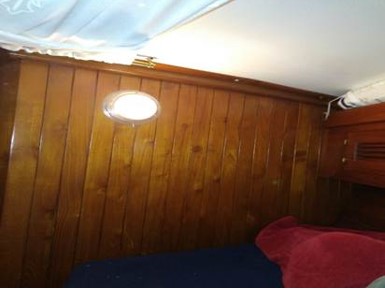
Before the new wiring went in. Day four dawned rainy and miserable but my spirits were undampened. The headlining was now dry and it took a couple of hours to get it screwed back in place. Then the cabinets could go back onto the wall. One tricky bit was running the wires attached to the back of one of the cabinets through the wall into the forward cabin in order to connect them to the back of the now fixed light. This gives us a red LED for night sailing in the forward head thus saving the gallant crews night vision. With Norma pulling wires through from the forward cabin while I held the cabinet in place next door we got it all together and connected with a minimum of swearing. That was it, I stepped back to admire my work and noticed that we had screwed the cabinets on completely wonky and so off they came again. A quick readjustment and then I stepped back and admired my work once again.
And it works a lovely bright light – Easy job that! So how long does it take to change a lightbulb on a yacht – 4 DAYS!!! We are now on day five and it is pouring with rain. Our compressor has been despatched from Slovenia and is in the reliable hands of DPD. According to the tracker it hasn’t actually left Slovenia yet, but I am full of hope. We are expecting Michal and Mirka to arrive at any moment to stay for a few days but that will be a tale for another day. |